Organ Restoration
Presented by Martin Burgoyne at the January 2009 meeting
In the beginning
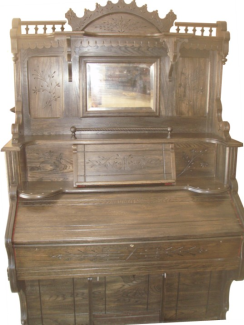
I had never restored an organ before and didn’t really know what to expect. A quick internet search gave me some background to pipe and reed organs and to my surprise an article on restoring reed organs.
Digging deeper I came across a reference to a book, Restoring and Collecting Antique Reed Organs by Horton Presley, so I promptly ordered it from the USA. So, I would not be alone in the restoration.
The organ was in a sorry state when it arrived just before Christmas 2008. However, by pumping the pedals vigorously all the keys produced notes, which gave me hope that the reeds were intact and not damaged. Some of the black keys were missing and many of the ivories were either high or low. Just getting the key board level would certainly be a long job. The amount of pumping required suggested that the bellows were in a very poor state and leaking badly. Only two of the ten stops appeared to work, though this could have been down to the leaking bellows.
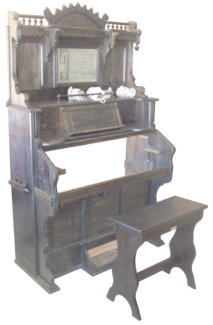
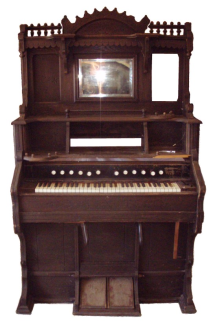
The case was intact but many of the panels had severe splits in them, or were already in a number of pieces. But every thing appeared to be there, apart from one small turned finial. I had originally hoped to be able to clean up the case and limit the refinishing to the application of good wax polish. Unfortunately the original finish was in a very poor state. In some areas, exposed to the sun, the old varnish had flaked off.
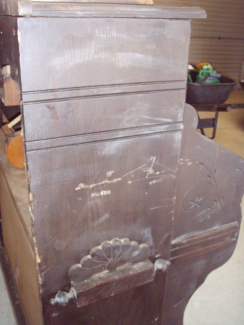
The sides had some deep scratches and the lid had broken off. The original gold lettering on the stop board had completely flaked off in some places making it difficult at first to decide who had actually manufactured the organ.
So what I had hoped would be a relatively simple refinishing process was now going to be a big job. I would have to strip all the old varnish off the case, and then sand it down and completely refinish it. It would mean totally dismantling the case into its individual components so that I would be able to strip off the old varnish, apply new stain, and then refinish and polish it.
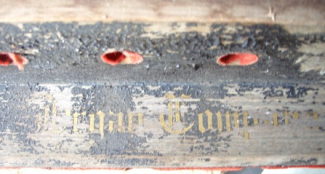
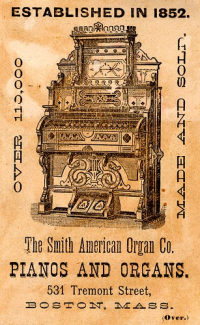
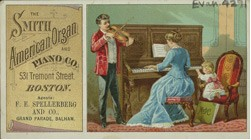
Investigating the lettering on the stop board with a magnifying glass, enabled me to eventually identify the manufacturer – Smith American Organ Company of Boston Massachusetts. An internet search showed that the company was founded in 1852 in Boston, Massachusetts USA where they continued to manufacture organs until the 1930s. A reprint of one of their old catalogues was also available – would I find our organ in it?
By taking digital photographs of the lettering I was able to ‘trace’ the letters and eventually got a stencil made which would enable me to reapply the gold lettering once the stops board had been stripped and refinished.
The Case
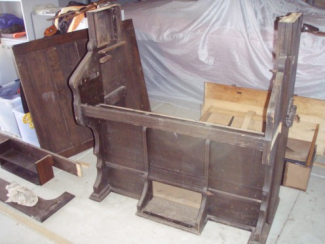
The case came to pieces quite easily. Everything was screwed together with perfectly machined wood screws, not like the cast ones of today. The base of the case was full of a century of mouse droppings, wasps nests, moth lava and dust, but there was no sign of any wood worm!
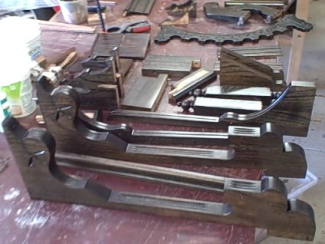
staining and varnishing
Some parts were glued together, but as it was animal glue it had disintegrated over the years, so things came apart easily. It was a long, slow, and dirty job, stripping the old flaking varnish off each piece, sanding them down, and then staining, and polishing each piece.
Each piece was given two coats of polyurethane varnish followed by two coats of wax polish. It was now time to rebuild the case. I used the original screws though occasionally I had to fill some of the holes to give them a better grip. Despite some warped shelves the case went back together. I decided to keep the old mirror. With its aged silvering I thought it would be better than a new one.
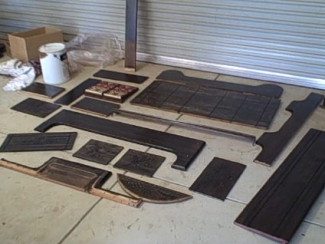
of the larger case parts drying
after staining and varnishing
The Action
As the case was dismantled access to the bellows and the action, which included the keyboard and stop board became possible. I was rather apprehensive at the thought of dismantling it and then trying to restore it. But I took the plunge! The action came off first, and I learnt a whole new vocabulary as I unscrewed and removed more and more bits - octave coupler, pitmans, vox humana, swells, mutes, pallets and reeds. The action really was an amazing mechanism, consisting of bits of wood, felt, leather pads, bent wires, hinges, springs, pieces of dowel and screws. I made copious notes and sketches and took more digital photographs to ensure I could put all the bits back in the correct place.
The keyboard was removed and each key was cleaned, and new felt attached to their bases. Some new black keys were made, stained and fitted. Many of the wooden parts, which made up the action had strips of felt applied to them. This originally sealed the stops and mutes preventing air getting through. Over the years much of this felt had been eaten by moths and so required replacement. Most of the hinges were made of cloth which had been similarly attacked, so they also needed replacement.
With keyboard and all the action removed I eventually got to the reeds – all 120 of them. At first I considered leaving them in where each one went. Some were well gummed up where mouse urine had corroded them, but they all cleaned up well. I used a solution of cloudy ammonia, with a little washing up liquid and water. They were left to soak for a couple of hours before cleaning, dunking in water and leaving to dry in the sun.
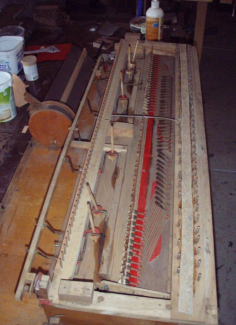
showing the two sets of
wire couplers
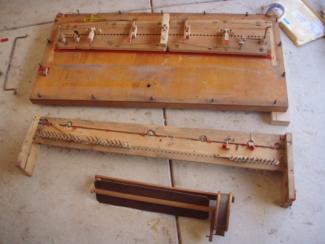
swells; The lowers keyboard with
pitman rods; and the vox humana
in the foreground.
Fortunately the delicate wooden cells into which each reed slotted were all intact, and the fine kid leather that formed the reed seals was also in excellent shape.
The Action, keys removed, showing the two sets of wire couplers place, as taking them out seemed a daunting task.
But things had gone well so far, and so I took the plunge and out they came.
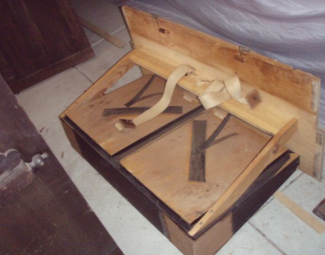
removed from the lower case
showing the valves, springs and
pedal straps.
The Bellows
With the action cleaned, repaired and restored, I was pleased that no pieces were left when I had finished. So it was time to look at the bellows.
I was initially surprised to learn that reed organs work on a vacuum, with air being sucked through the reeds rather than blown. The pumping action on the pedals, actually sucks air out of a pair of small exhauster bellows which in turn sucks air out of the large main bellows, creating a vacuum.
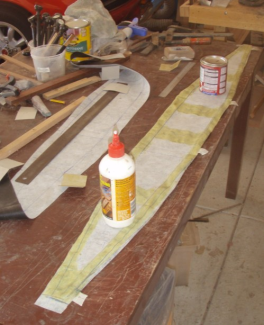
of the main exhauster
The bellows then try to fill, and suck air through whichever reed, or set of reeds, has been opened by their keys. But in the case of this old organ, air was being sucked through hundreds of gaps and holes worn or eaten in the exhausters, bellows, and the various felt seals of the action.
The bellows were riddled with holes, and with the moth eaten felt on the mutes and swells, it wasn’t surprising that you had to pedal so vigorously to get any sound out!
So the bellows needed re-covering, a tricky job according to Horton Presley. But at least the cloth hinges were in fine shape, so that would be one less job. My first problem was to find some suitable bellows material. An organ materials supplier in the USA could provide me with twice as much as I really wanted for US$100, plus postage of another US$120!! So I decided to look locally, and found something I thought would do in Spotlight.
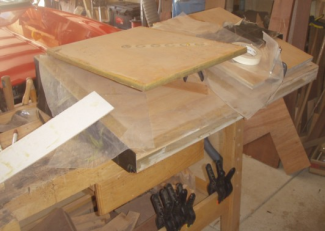
exhausters
I carefully removed the old material and used it as a pattern. I used contact adhesive to fix the new material in place, and while the main bellows went together fairly easily it required two attempts to re- cover one of the exhausters. New cloth valves were fitted and the system was tested for leaks. All seemed well! The next task was to install the bellows and renew the seals where the action and sound board joined on. Leaks here would reduce the efficiency of the bellows, requiring more pumping of the pedals. The re-covered pedals were fitted next and the straps joined onto the exhausters.
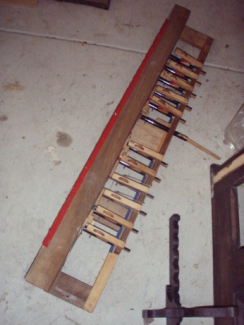
The Stops
This part of the action is fitted directly to the top of the main action and key board. Some stops control a particular variation of mutes and swells in either the treble or base registers, giving the organ its wide range of sounds. Some couple one key to another an octave higher so giving a richer sound or two notes for the price of one! The ingenious ‘vox humana’ controls a sort of fan which gives a tremolo effect.
Again the whole system was contrived of bits of wood, springs, wheels, felt and bent wires held together with numerous screws. The main task was replacing the small felt pads that prevent the whole system from rattling when the low bass notes were played.
The Keyboard
Before fitting the restored stop board it was time to work on the key board. This proved to be one of the longest jobs. Four new black keys had to be made, and around forty of the sixty two keys needed some sort of adjustment to get them level.
More work was then needed to prevent them sticking or catching on their neighbours. It involved small pieces of felt glued here and there, or small discs of card glued to the top of any short pitman rods.
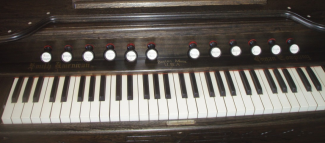
Adjustments were then made to the small turn button under the keys which activated the octave couplers. To ensure the keys didn’t stick in the down position, a mixture of paraffin wax and bees wax was used to lubricate the brass pegs that each key moved up and down on. Altogether a very fiddly and time consuming job, but satisfying once done.
The finishing touches
With the keyboard finished I could now attach the stop board. The knee swells were also attached and each of their mechanisms checked for smooth working. Almost finished!
The keyboard lid required some work to get it to fit, and I made a new key to enable it to be locked.
To complete the organ I rebuilt and refinished the rickety organ stool. So there is now some where to sit and play the organ.
