
April 2026 meeting report
Reporter:
Carolyn Ellis
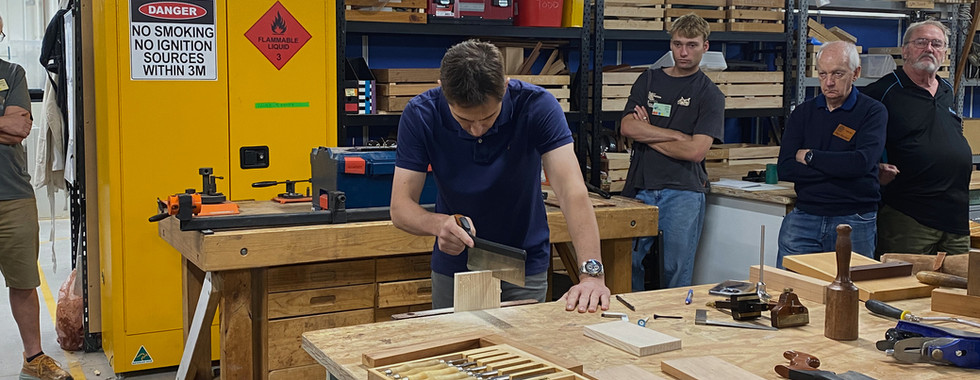
Guest Presentation: Hand Tools with David Howlett
David Howlett from the Perth Wood School visited to give a talk on the effective use of hand tools, with a particular focus on handsaws. David introduced himself and explained that he has over 30 years of teaching experience, with a strong interest in workshop safety and challenging long‑held woodworking myths.
One example he discussed was the common advice to “always put a plane down on its side.” David explained that this is largely unnecessary, referencing a 2020 Fine Woodworking Magazine article by Vic Teslin that debunked the myth—except in the case of wooden planes without adjusters. His advice was simple: place the plane down in any position, as long as it is done gently.
David then turned his attention to marking knives. He clarified that marking knives are not used to cut surface fibres to prevent tear‑out, but rather to achieve precise and accurate marking. Their thicker blades create visible lines and form a small angled groove that perfectly guides a chisel. He emphasised that Stanley knives are unsuitable for this purpose because their blades are too thin, the lines they produce are difficult to see, and they do not hold a chisel accurately.
Next, David recommended that every woodworker invest in a high‑quality set of chisels. He suggested Narex chisels from Timbecon as offering the best value for money, combining quality and affordability.
The discussion then moved to handsaws, which David described as the single most important tool in the workshop—without a handsaw, there is no woodwork. He recommended the Irwin tenon saw, available from Bunnings for around $21, as an excellent entry‑level option. While it is electro‑hardened, extremely sharp, and long‑lasting, it cannot be resharpened. For higher‑end tools, David rated Veritas saws as the best balance of quality and price, and Lie‑Nielsen saws as the finest available, though very expensive. Both of these can be resharpened. He also spoke about Japanese saws, noting that while they are excellent tools, they offer less control than traditional Western saws and are difficult to correct once a cut begins to wander.


David concluded with three key principles for achieving accurate and successful cuts:
Timber positioning: The timber should be held low in the vice. If it is positioned too high, it can flex, causing the blade to resonate and resulting in a poor‑quality cut.
Workbench setup: A good workbench does not need to be large; traditional dimensions are approximately 1800 mm × 600 mm. More important than size is that the bench is flat and rigid. Wheels should only be added if necessary and should be retractable so all four legs rest on the floor. The bench should be light enough for one person to move and set at the correct height—no higher than 900 mm for anyone 6 ft or under—allowing work without lifting the elbow or shoulder.
Body position: Proper stance is essential. The elbow should align with the saw and move freely past the body. Feet should be positioned to the side of the cut in a stable split stance. If only part of the blade is being used, the woodworker should shift forward slightly. Right‑handed users whose hand naturally rolls inward should move slightly to the left. David recommended practising vertical cuts to refine body positioning.
He also challenged another outdated belief—lubricating the saw with wax or soap to prevent sticking—firmly dismissing it as unnecessary. As he put it, “If you cut straight, it won’t stick”.
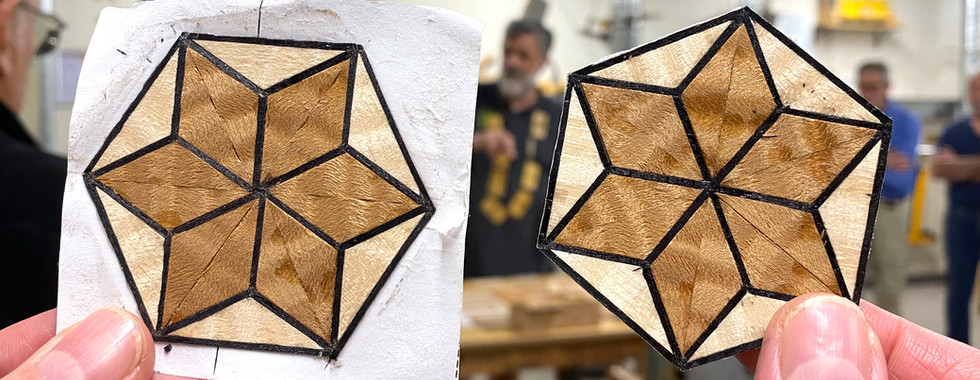
Member Presentation: Marquetry Patterns using Coloured Veneers with Life member Ian Houghton
Before a trip to Japan in 2025, Ian began experimenting with marquetry patterns using coloured veneers. There are approximately 10–12 colours available commercially, although veneers can also be dyed. After returning from Japan, Ian described this exploration as having “disappeared down a marquetry rabbit hole.”
His first project was a multilayered box, a form commonly seen in Japan. The exterior was veneered with a range of patterns laid at different angles. However, the method used proved unsuccessful, as routing channels for stringing caused the veneer to tear.
Ian then showed his second attempt, which was much more successful. Despite this, because the top and bottom were made separately, they did not fit together perfectly.
For his next box, Ian adopted a more traditional approach by constructing the box as a single piece and cutting the lid off afterwards. This resulted in a perfectly fitting lid.
Initially, he had avoided this method out of concern that the interior veneer might tear during the cut, but this did not occur. Once the lid is removed, he veneers the exterior of the box.
Ian also discussed where he finds inspiration for his designs and how he cuts and assembles his patterns. While woodwork is an obvious source, he also draws ideas from quilting and needlework, as these patterns can be readily adapted to veneer work.
He explained that the most important consideration when laying out a pattern is how light reflects off the surface. To help maintain consistency, he marks one face of the veneer with pencil before cutting. Determining the correct size for each piece is the most time-consuming part of the process and involves significant trial and error. Ian creates numerous sample boards and applies finishes before committing to a pattern and timber species, as this allows him to quickly assess colour and appearance under different finishes before starting the final piece.

Most of Ian’s pattern pieces are cut using a guillotine. He demonstrated how he has taped a drafting square to the guillotine bed, allowing him to produce repeatable angles accurately.

For curved cuts, Ian uses a scalpel—specifically a Swan Morton scalpel fitted with a jarrah handle to make it thicker and easier to grip. His preferred blade is the 10A, which can be purchased from hobbytools.com.au.

To create starbursts, Ian built a tapered jig that allows him to cut packs of wedges. This supports the veneer all the way to the tip, enabling the creation of very fine points. He noted that some timber species, such as maple, are particularly well suited to this technique.


Previously, Ian used masking tape on the back of his patterns but has since found that clear contact adhesive (commonly used for covering books) works much better. He sourced his contact from edartsupplies.com.au, noting that cheaper versions do not perform as well. He cuts the contact to size, marks a centre line using a steel ruler, and builds the pattern outwards from the centre. Once one half is complete, the ruler is removed and the other half is assembled, which helps minimise pattern creep. After completion, paper is glued to the front of the pattern, and the contact is peeled off. Ian does not dilute the glue, as he wants to avoid excessive soak into the veneer.
For individual shapes such as maple leaves, he assembles the pieces on masking tape, opens the joints slightly, and applies glue using a small bottle with a fine metal nozzle. Once the glue has dried, the tape is removed.


Finally, Ian uses Titebond III to glue the finished veneer panel to its substrate. He then embellishes the edges with handmade stringing, created by laminating layers of black veneer. Once dry, the glue lines are invisible. When applying stringing to a box, he carefully considers both grain direction and light reflection.